Vanilla ice cream is hands-down the most versatile ice cream to make. And this Ninja Creami vanilla ice cream recipe is super-easy to make!
Its ingredients are the base for so many other ice cream flavors such as chocolate chip cookie dough, mint chocolate chip, maple walnut, and pistachio. My family loves to eat yummy vanilla ice cream with ooey-gooey chocolate chip cookies, brownies fresh out of the oven, and warm apple pie. We are vanilla ice cream fans and enjoy making it at home with our Ninja Creami.
Skip to Ninja Creami Vanilla Ice Cream Recipe
Read More About The Ninja Creami
Be sure to read our full Ninja Creami Review. It’s great at making ice cream but requires a little planning because you have to freeze your mix for 24 hours.
The Ninja Creami Makes Super Smooth Ice Cream
The Ninja Creami makes a super smooth vanilla ice cream. What I enjoy most about the Ninja Creami is how I can prep the ice cream and keep the frozen ingredients chilled in the fridge until it is time to blend and serve.
The Ninja Creami recipe makes one pint-sized jar of ice cream but you can also purchase multiple pints to create several containers of vanilla ice cream at once. This is great for having that base flavor and then using mix-ins to add layers of cookies and candy to your recipe!
When I made my vanilla ice cream, I used the recipe found inside the Ninja Creami recipe booklet that came with my appliance. There are over 15 delicious recipes for ice cream (both lite and regular), sorbet, and milkshakes. I’d recommend starting with the vanilla and chocolate ice cream recipes and then adding in different flavors to create a variety of mixtures.
Make This Recipe With What You Already Have
The only ingredient I added was the seeds found inside a real vanilla bean pod in addition to the vanilla extract. I love the little specs of vanilla bean in my ice cream and the depth of flavor it adds to the recipe. Vanilla beans can be purchased online or even found in your local grocery store next to the spices. It is not necessary but it does add a punch of flavor to this Ninja Creami vanilla ice cream recipe!
To get started with the vanilla ice cream, I used ingredients that I keep in my pantry and refrigerator such as cream cheese, sugar, heavy cream, and whole milk.

Where to Find Vanilla Bean Pods
Vanilla bean pods can typically be found on the spice isle of your local supermarket. While you can use only extract for this recipe, the vanilla seeds add a rich flavor boost and enhance the appearance of your ice cream.
I made sure my cream cheese was nice and soft. I then added the sugar and vanilla extract with a whisk to the cream cheese until it looked like frosting. Then I mixed the heavy cream, milk, vanilla extract, and vanilla bean seeds into the frosting mixture.
I used my whisk again to combine all the ingredients until smooth. Then, using my rubber spatula, I poured the mixture into my pint-sized container and secured it with a lid before freezing for 24 hours.
Process With The Creami
Once I was ready to make the vanilla ice cream, I removed the pint from the fridge and placed the jar inside the plastic outer container for the Ninja Creami with the blade attached. Then, I selected “Ice Cream” and made sure my container was in place for the mixing to begin. Quickly, the ice cream began to blend and within a few minutes I had creamy, delicious vanilla ice cream ready to eat!
The Ninja Creami vanilla ice cream is simple and satisfying, and is truly a stand-alone recipe. I know my family will enjoy making it again and again and I hope your family enjoys it too!
As we noted in our full Ninja Creami Review, it works differently that traditional ice cream makers. But the result is every bit as delicious as ice cream made with traditional churn ice cream makers.
Plan Head
It requires a little bit of planning; you can’t just decide to make ice cream and have it ready in an hour. In fact, you’ll need about 24 hours because the Creami’s instructions say to freeze your mixtures that long before blending. While 20 hours in the minimum, Ninja always recommends you freeze them for the full 24 hours.
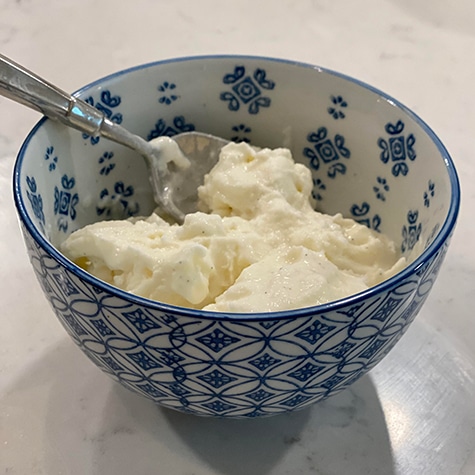
Ninja Creami Vanilla Ice Cream Money Shot

As you can tell from the photo, the Ninja Creami can really churn out some delicious ice cream. The Creami can make milkshakes, sorbets, smoothie bowls, and gelatos, and more. But making ice cream is where the Ninja Creami really shines!
Ninja Creami Vanilla Ice Cream Recipe Tips
- Use vanilla extract and the seeds from a vanilla bean pod
- Although I didn’t do it here, you can heat your milk to help dissolve the sugar in this recipe–it’ll make for a slightly more smooth, creamy texture.

Helpful Tips for Our Ninja Creami Vanilla Ice Cream Recipe
- If you want a lower-calorie dessert, substitute oat, almond, or cashew milk for your whole milk or even your heavy whipping cream. The result won’t be as creamy as this recipe, but will be much healthier.
- Don’t be afraid to reprocess your ice cream, especially if it comes out crumbly.
- Store any remaining ice cream in the pint container and place it in the freezer. When you are ready, simply reprocess with the Ninja Creami.
Ninja Creami Vanilla Ice Cream Recipe
Ninja Creami Vanilla Ice Cream
Course: DessertDifficulty: Easy2
servings10
minutes541
kcalIngredients
1 Tbsp of cream cheese
⅓ cup of granulated sugar
1 tsp of vanilla extract
Seeds from 1 vanilla bean pod
3/4 cup of heavy whipping cream
1 cup of whole milk
Directions
- Put cream cheese, granulated sugar, vanilla extract, and vanilla seed in a medium-sized bowl
- Mix well with a spatula
- Add heavy whipping cream, cup of milk, and mix well with whisk
- Pour mixture from bowl into the Ninja Creami container all the way to the fill line
- Freeze for 24 hours
- After 24 hours, process with the Ninja Creami using the Ice Cream setting
Notes
- Calories are per serving.
Why Stop Here?
You can use this recipe as a base for several more delicious treats, like Cookies & Cream ice cream. If you need more inspiration, check out our these delicious Ninja CREAMi recipes.